Tuesday, October 2, 2012
Human Body Levers Supplement Websites
**A potential test question could be to classify the different 1st, 2nd, and 3rd class lever systems and then identify an example from them in the human body. I have listed the following websites to help you answer these questions. Please leave your answers in the comment section of this blog.
This hyperlink will take you to a website that has several different visual examples reinforcing the levers in the human body.
This hyperlink takes you to a website that emphasizes more of a physics approach to the 3 distinct types of levers. This might help you better relate them to the exmples in the human body.
Human Body Levers
The following is what we will be doing this week in my Human Anatomy Class. It is an introductory lesson about human body levers. It includes all of the worksheets given out. Students, please give me two examples of levers that you are aware of. Leave them in the comment section. Parents, please leave any questions or comments you may have.


Topic: Biomechanics & Human
Body Levers
Grade
Level: 9-12
Inquiry
Level: Low
Learning
Outcome/Instructional Objectives:
Students
will derive the attributes of a lever
Students
will identify first, section and third class levers
Differentiate
between first second and third class levers
Recognize
the levers in the human body
Background
Information: Students will have a basic understanding of physics, therefore
they will understand how simple machines work. This will be the beginning of
their exploration of the human body. We will still review physics before this.
Sequencing
of the Lesson:
We
will begin with an activity which is classifying different objects into two
categories which are labeled yes and no. After this, we will ask the students 4
questions about levers which will transition into education of the three
classes of levers in the human body system. Once this is complete we will
review the different lever systems and then assess them.
Materials
and Equipment: A kit that is labeled Human Lever Systems which contains a
string, boards, and various hooks and U bolts that attach to a ring stand, a
powerpoint projector, white board, markers, and a space to show the different
human body levers.
Safety
Equipment & Considerations: The only safety concern would be
knowledge of how to use the human lever kit safely without breaking the string
or putting tension on the string.
Instructional
Activities
- Anticipatory Set
“Make Work Easier!”- I will give students a list of several different objects that include levers and non levers and ask them to differentiate between them.
That is, they should determine what all the “yes” examples have in
common. No one should call out or name
the concept until told to do so. Draw a
T-chart labeled “Yes” and “No” on the board similar to the following example:
Yes
|
No
|
Concept: The Lever. I will ask the students the following questions in class.
§ What do
all the yes examples have in common? (They are levers with rotation around an
axis which make work easier.)
§ How do
they make work easier? (They multiply the effort force and change the direction
of your force.)
§ What are
other levers that you can think of? (Cranes, dolleys, baseball bat, bottle
opener)
§ What are
some levers in the human body? (Head,
foot, arm)
- What I will use as instruction
- Guided Practice-
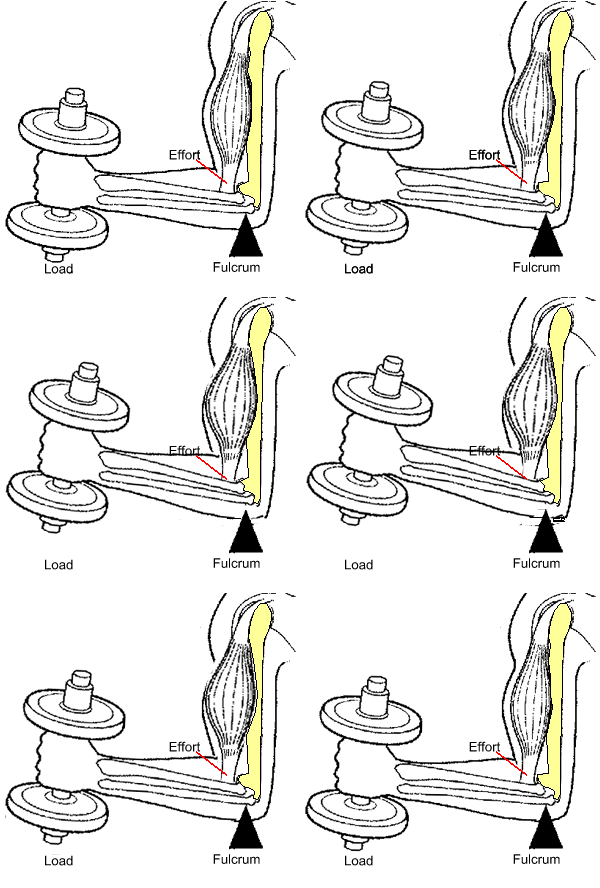
Educate/review characteristics and components of a lever:
fulcrum,
effort, and load. I will be using an example from kit to demonstrate that the lever is the
bar that is free to pivot about a fixed point.
The fulcrum is the point around which the lever rotates i.e. the
joint, point where human body touches the floor, wall, or chair. The resistance force, or load being
lifted by the lever, can be either an object we are moving or the human body
itself. The part of the lever that
exerts the resistance force is called the resistance arm. The effort force is provided by
muscles or tendons. The part of the
lever on which the effort force is applied is called the effort arm.
- Independent Practice
I plan on having students divide into groups and
draw a rough diagram, one at a time, a 1st, 2nd, and 3rd
class lever of the human body. They will
label the fulcrum, effort, and load.
Stop between each class of lever and have students, one from each group, present their examples while discussing the
drawings(differences, similarities, misunderstandings) with the class.
Hand out the x-ray example worksheets,
discuss and confirm human levers.
- Closure
To close I will take students through the pictures features below and they will correctly identify the classes of unlabeled lever diagrams as well as determine
the position of each aspect of the lever.
If time allows, review PowerPoint examples and identify those as 1st,
2nd, or 3rd class levers..
Real-life Application of Concept
Using the x-ray worksheets, students
can see how levers actually work in a real life situation and see the details
they learned of levers portrayed in an actual scenario. They also discuss other levers they encounter
in real life.
Resources
The
Human Lever System: A Biological Inquiry packet by Science Kit was used for the
lesson.

Subscribe to:
Comments (Atom)

